Overview
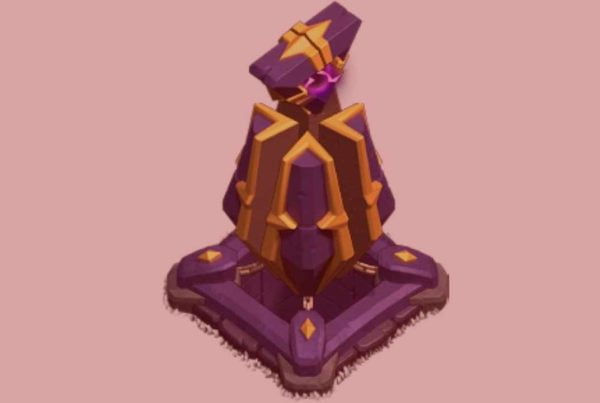
Mortars serve as the player’s initial light splash defense system, providing area damage capabilities. When an enemy enters its range, the Mortar launches a powerful explosive shell, inflicting area damage. Beginning at level 8 (Town Hall 10), the Master Builder from the Builder Base can upgrade a single Mortar to resemble a Multi Mortar. This upgraded Mortar fires three-shot bursts, albeit with less damage, and shoots without any initial delay like standard Mortars. To upgrade your Mortar, your Multi Mortar must be at least level 8, available at Builder Hall 8.
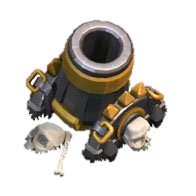
Mortars fire long-range explosive shells every 5 seconds, causing significant splash damage to ground units within a small radius of the impact point. Their combination of splash damage and long range makes them highly effective against groups of weaker enemies such as Barbarians, Archers, or Goblins. Multiple Mortars can effectively eliminate Giants and Wizards.
The Mortar’s low damage per second (DPS) stems from its slow firing speed. To determine its damage per shot, multiply its DPS by 5 (its hit speed). The shell’s explosion is potent enough to knock back smaller troops, which may result in a change of targets depending on the situation.
However, Mortars have several drawbacks, including a 4-tile blind spot, slow rate of fire, and low DPS, making them less effective against high-health troops. Additionally, they cannot target air units like Balloons. Fast troops such as Goblins can easily dodge Mortar attacks due to the shell’s travel time (over a second at maximum range).
Strategies
Defensive Strategy
Generally, Mortars should be positioned near the center of your base, protected by at least one set of walls. This allows them to attack from a distance behind other structures. A triangular or square arrangement of Mortars near the center of your base enables multiple Mortars to target the same area. Due to their potent splash damage, Mortars can quickly eliminate light troops.
From Town Hall 9 and above, when heavier defenses like the X-Bow become available, Mortars are best used on the outside, guarded by non-defensive buildings to target and group other troops. At each level, a Mortar can kill an Archer of the same level in one shot.
At lower Town Hall levels, Mortars are crucial for destroying Barbarians and Archers. Place them near the center of your base for maximum coverage. Pairing a Mortar and Wizard Tower is a smart move, as the Mortar covers a large area while the Wizard Tower defends against mass air troops and covers the Mortar’s blind spot. This combination is effective against various attacks when paired with an Air Defense and a storage unit. The storage serves as a damage sponge, while the defenses eliminate swarms of troops.
If your base is frequently attacked with Lavaloon strategies (Lava Hounds + Balloons), keep the Air Defense separate from the other three defenses. However, avoid placing towers too close together, as a few well-placed Lightning Spells can easily destroy them. If possible, place another building between them.
Position Mortars near each other but not within the same walled section, creating a kill-zone where low-health troops struggle to survive. Be careful not to cluster Mortars too much, as troops can easily enter their blind spots and spells or flying troops can destroy all Mortars at once.
Upgrade Mortars with caution, as many players take advantage of this opportunity to attack. It’s wise to upgrade one Mortar at a time, but upgrading all at once is also viable, as it allows you to quickly benefit from fully upgraded Mortars at your current Town Hall level. This is best done when you have a Shield enabled.
In higher levels where Mortars may be less relevant, you can place them outside your walls, in corners, to prevent Archers from easily sniping other non-defensive buildings. However, without additional protection, these buildings are susceptible to Wizards or Minions – the former can survive a few shots from the Mortar, while the latter is immune to Mortar attacks.
Mortars can also affect the pathing of troops that only target defenses, such as Balloons or Hog Riders. In the case of Balloons, a single Mortar can lure an entire army towards traps, either wiping them out or significantly weakening them. For Hog Riders, luring them away from the base’s core exposes them to heavier defenses for longer periods, or leaves other troops more vulnerable to attacks.
Offensive Strategy
The Mortar’s dead zone, slow firing rate, and inability to target air troops make it susceptible to various attack strategies. Fast melee troops like Barbarians or Goblins (after resource structures are destroyed) can rush the Mortar and quickly enter its blind spot. Unfortunately, Archers will always stop and start firing at a Mortar before entering its blind spot, so pairing them with a meat shield (e.g., a Giant) is a good idea.
The Mortar’s relatively low hitpoints make it highly vulnerable to Giants and Lightning Spells. It takes only three properly-leveled Lightning Spells to eliminate any Mortar (at higher levels, two Lightning Spells may suffice).
Mortars’ inability to target air troops renders them easy targets for Balloons, Dragons, and Minions if unprotected by Air Defenses. Be cautious of Mortars positioned near Wizard Towers, as this could be a tactic to group troops together for the Wizard Towers to attack.
When deploying troops, avoid clustering low hitpoint ground troops. The Mortar excels at dealing splash damage, which can be mitigated with a Healing Spell. If a building is protected only by a Mortar, using one or two Wizards can quickly destroy it during a ground attack.
Mortar Important Info
| Town Hall Level | 1 | 2 | 3 | 4 | 5 | 6 | 7 | 8 | 9 | 10 | 11 | 12 | 13 | 14 | 15 |
|---|---|---|---|---|---|---|---|---|---|---|---|---|---|---|---|
| Number Available | 0 | 0 | 1 | 1 | 1 | 2 | 3 | 4 | 4 | 4 | 4 | 4 | 4 | 4 | 4 |
| Range | Attack Speed | Damage Type | Unit Type Targeted |
|---|---|---|---|
| 4-11 | 5s | Splash - 1.5 tiles | Ground |
Gear Up Stats
| Gear Up Cost | Gear Up Time | Home Village Mortar Level Required | Multi Mortar Level Required |
|---|---|---|---|
| 8,000,000 Gold | 14d | 8 | 8 |
Clash of Clans Mortar Upgrade Chart
| Level | DP/Sec | DP/Sho | HP | Gold Cost | Build Time | Experience Gained | TH Level Required |
|---|---|---|---|---|---|---|---|
| 1 | 4 | 20 | 400 | 5,000 | 3h | 103 | 3 |
| 2 | 5 | 25 | 450 | 25,000 | 6h | 146 | 4 |
| 3 | 6 | 30 | 500 | 100,000 | 12h | 207 | 5 |
| 4 | 7 | 35 | 550 | 200,000 | 1d | 293 | 6 |
| 5 | 9 | 45 | 600 | 400,000 | 2d | 415 | 7 |
| 6 | 11 | 55 | 650 | 750,000 | 2d 12h | 464 | 8 |
| 7 | 15 | 75 | 700 | 1,500,000 | 3d | 509 | 9 |
| 8 | 20 | 100 | 800 | 2,500,000 | 3d 6h | 529 | 10 |
| 9 | 25 | 125 | 950 | 3,500,000 | 4d 6h | 605 | 11 |
| 10 | 30 | 150 | 1,100 | 4,800,000 | 5d 12h | 689 | 11 |
| 11 | 35 | 175 | 1,300 | 5,800,000 | 7d 12h | 804 | 12 |
| 12 | 38 | 190 | 1,500 | 6,500,000 | 8d 18h | 869 | 12 |
| 13 | 42 | 210 | 1,700 | 8,200,000 | 9d 12h | 905 | 13 |
| 14 | 48 | 240 | 1,950 | 16,500,000 | 17d | 1,211 | 14 |
| 15 | 54 | 270 | 2,150 | 19,000,000 | 18d | 1,247 | 15 |
